
这一课要实现点击Send Button开启新的Activity。
创建新的Activity
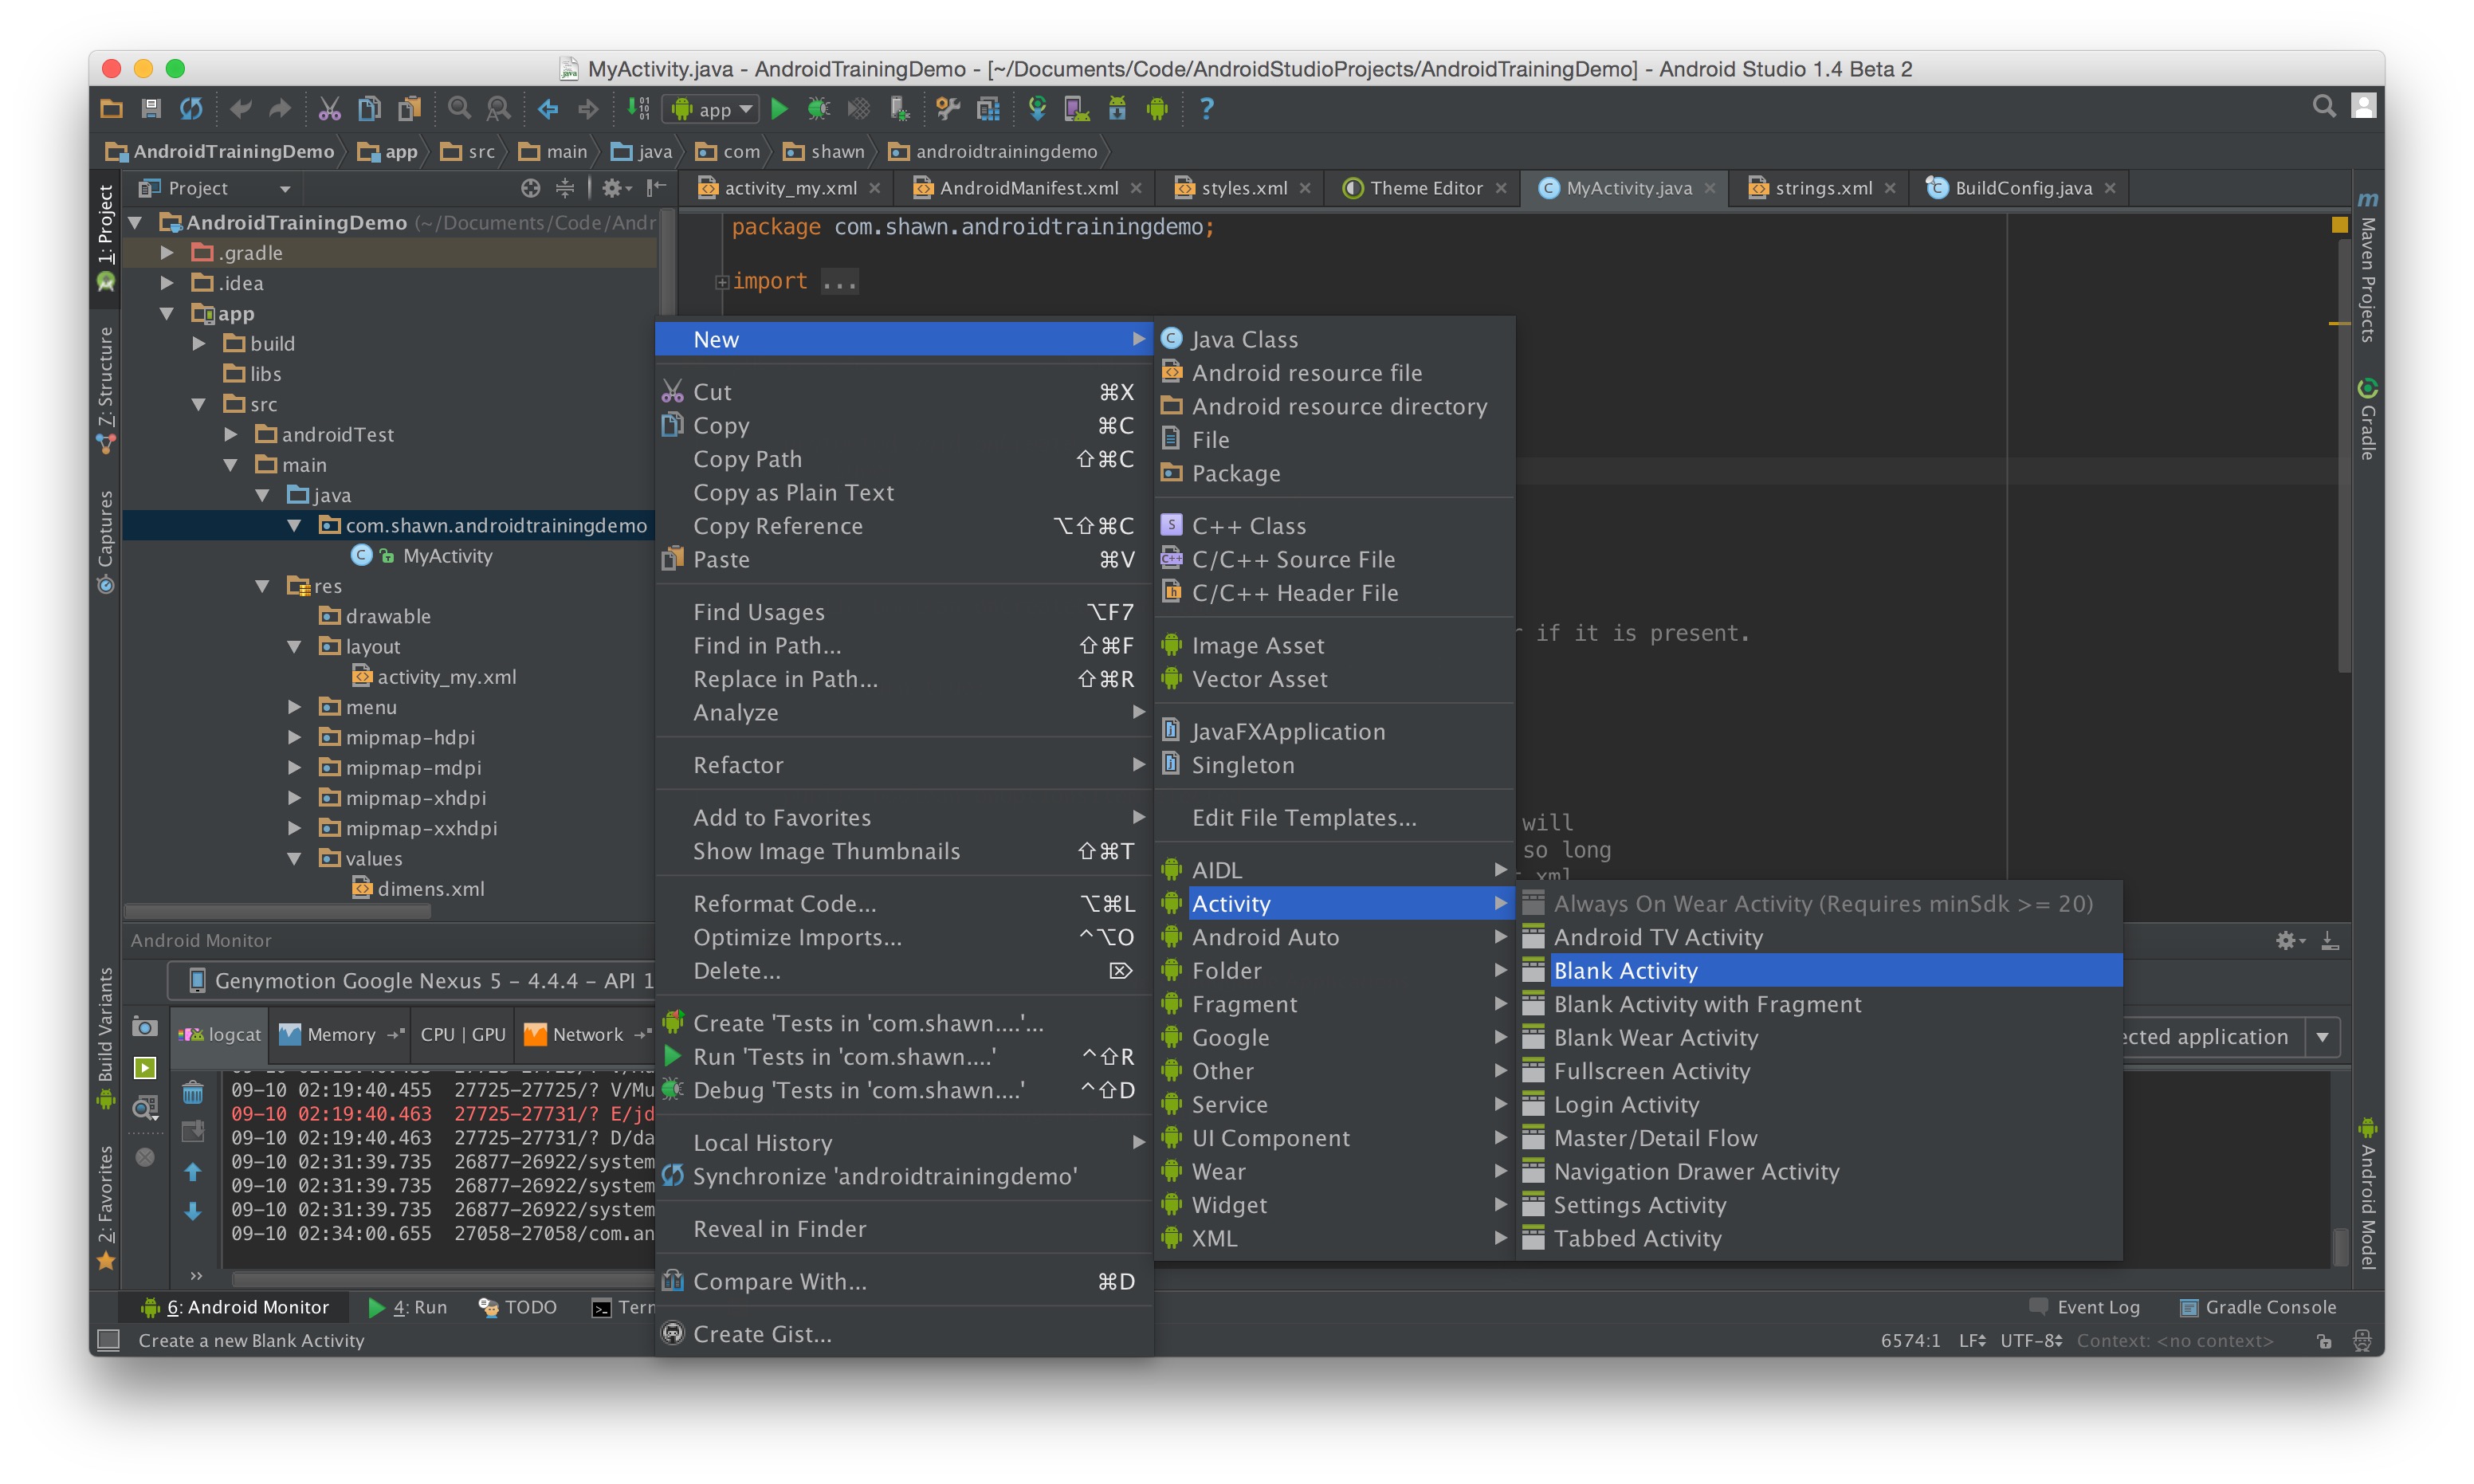
- 右键你的activity所在目录,如图选择新建空Activity
- 填写相关File name,如图
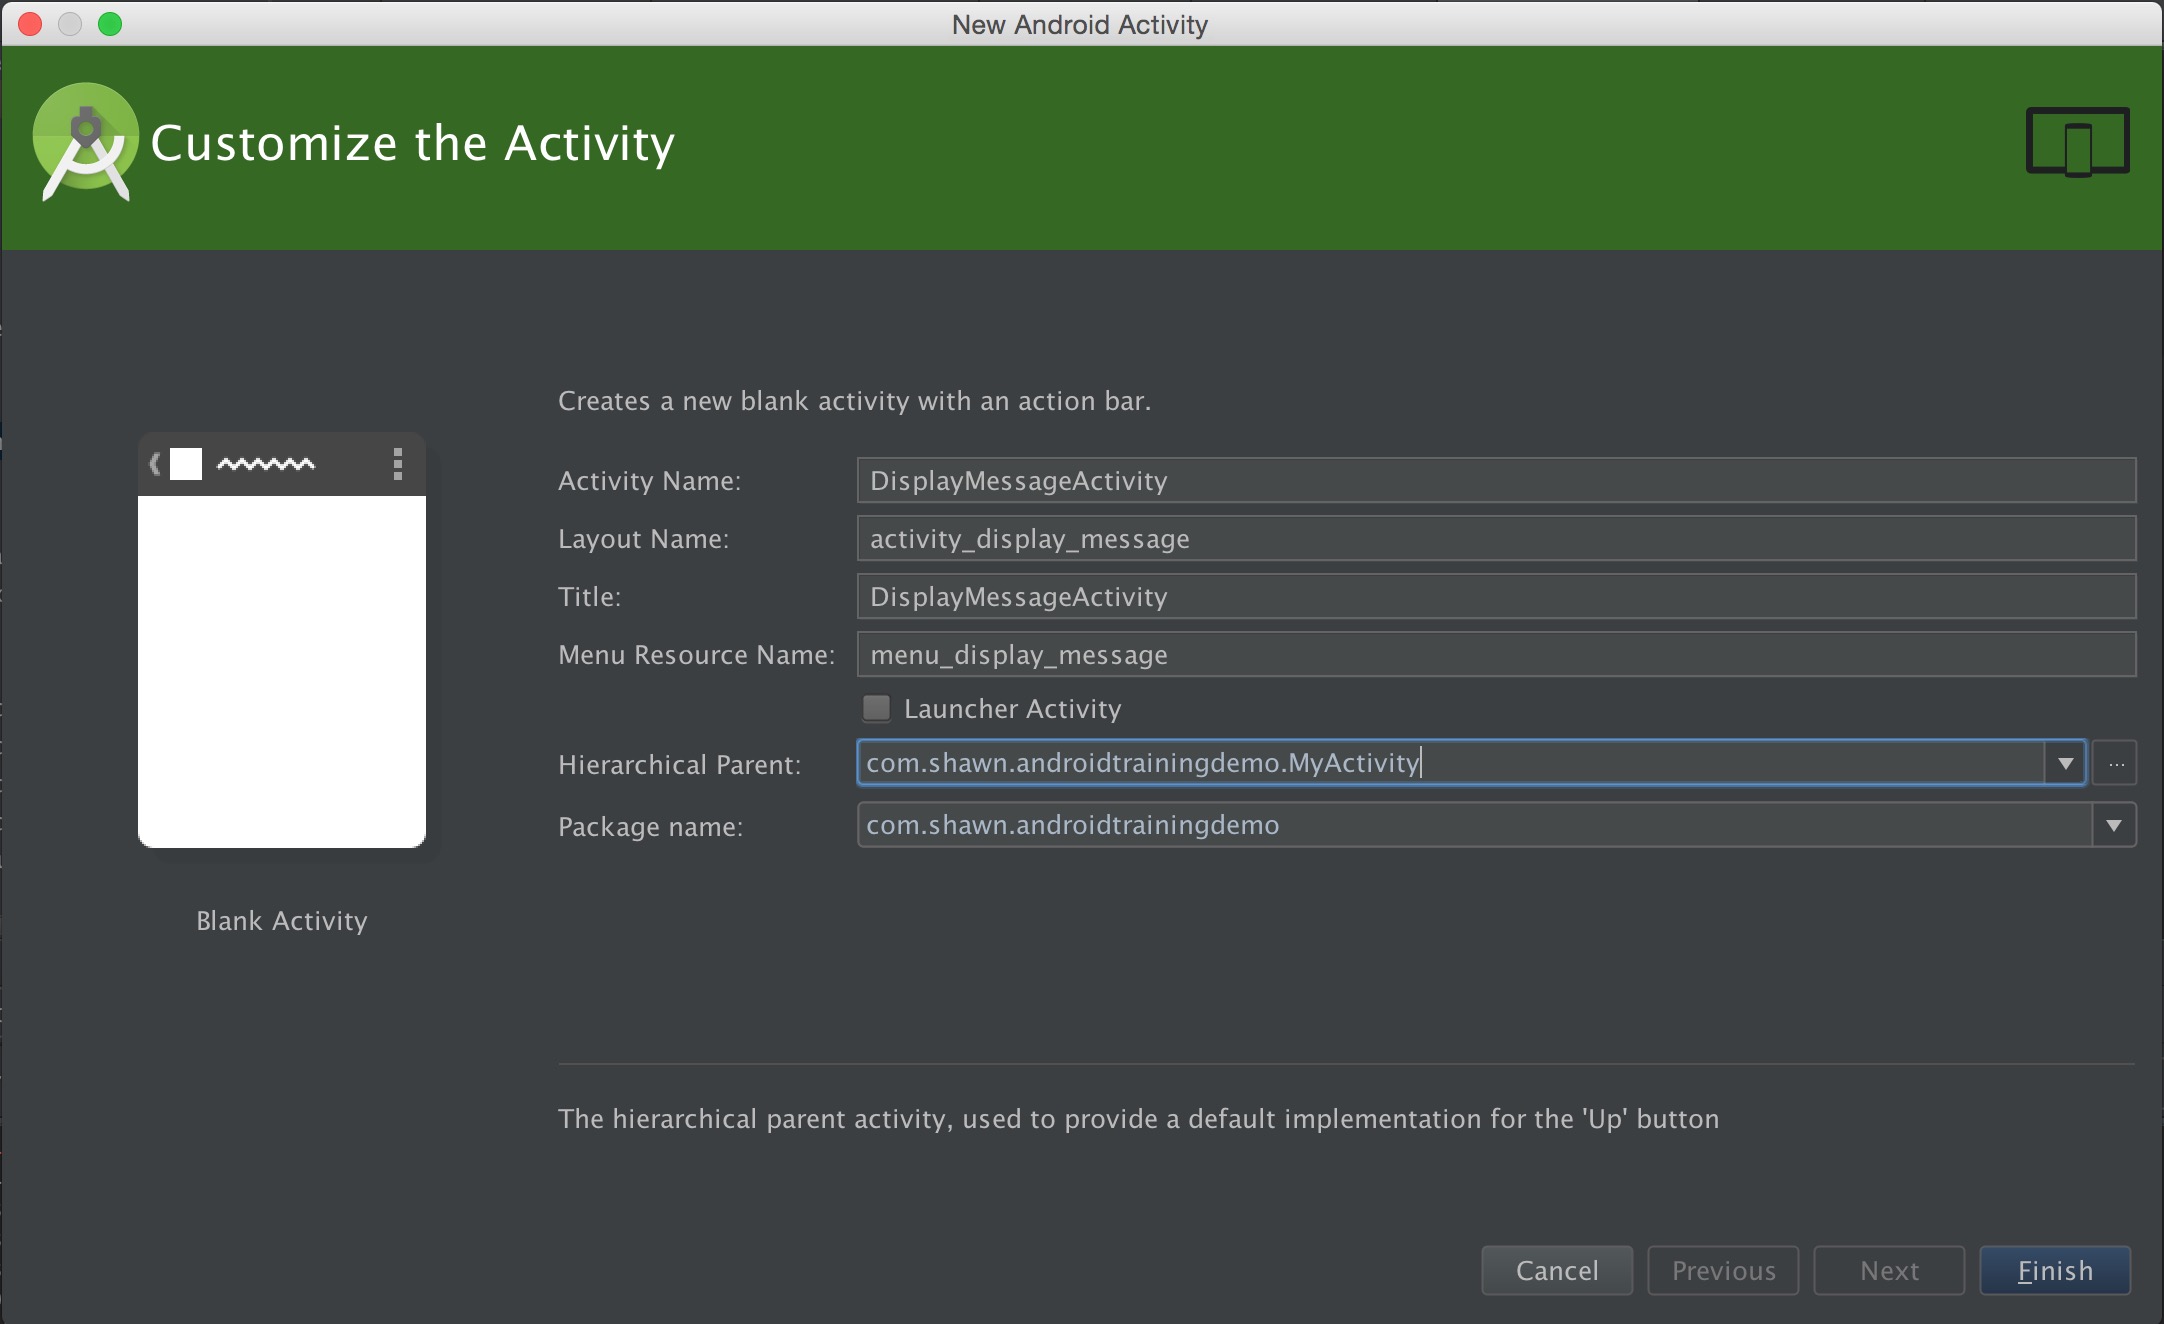
- 点击Finish
值得注意的是,这里除了创建了选项中的相关文件外,还做了两件事
- 自动实现了DisplayMessageActivity的onCreate方法,并且setContentView,将布局文件与Activity连接在一起。
- 在Manifest配置文件中添加了以下代码
1
2
3
4
5
6
7
8<activity
android:name=".DisplayMessageActivity"
android:label="@string/title_activity_display_message"
android:parentActivityName=".MyActivity" >
<meta-data
android:name="android.support.PARENT_ACTIVITY"
android:value="com.shawn.androidtrainingdemo.MyActivity" />
</activity>
意思是在配置中声明一个Activity,parentActivityName指actionbar左上角返回按钮的点击后要返回的上级页面,只适用于API 16及更高,若要在更低版本实现这个效果,可以使用support v7包以及添加对应的meta-data。现在的AS非常智能,对于自动添加相关依赖的功能非常完善,所以我们只管写上相关代码,就会自动生成依赖。
为之前添加的Send按钮添加事件
回到activity_my.xml布局中,修改button如下
1
2
3
4
5<Button
android:onClick="sendMessage"
android:layout_width="wrap_content"
android:layout_height="wrap_content"
android:text="@string/button_send" />打开MyActivity.java文件,添加对应sendMessage方法
1
2
3
4
/** Called when the user clicks the Send button */
public void sendMessage(View view) {
// Do something in response to button
}
这是一种特殊写法,若想点击事件能顺利执行,方法必须满足
- 方法为public
- 返回为void
- 参数只能有1个,为View类型,而传入的对象即为被点击的Button对象
建立Intent
1. 创建Intent
An Intent is an object that provides runtime binding between separate components (such as two activities). The Intent represents an app’s “intent to do something.” You can use intents for a wide variety of tasks, but most often they’re used to start another activity.
顾名思义,intent指”要去做什么”,它适用多种任务场景,这里我们用来在两个Activity之间通信。
1 | Intent intent = new Intent(this, DisplayMessageActivity.class); |
Intent构造函数包含两个参数,第一个为Android特有的上下文Context token,Activity是Context子类,所以我们用this,第二个为要使用这个Intent的组件类对象。(这里采取硬编码方式,是Intent提供的一种更高效的方式)
2. 通过findViewById()方法找到EditText,并得到其中的文字
1 | EditText editText = (EditText) findViewById(R.id.edit_message); |
这里用到的R.id.edit_message是之前我们在布局文件中定义,并在R文件中自动生成的对应id。
3. 将信息存入Intent
Intent可以以key-value形式存储信息,称为extras
1 | intent.putExtra(EXTRA_MESSAGE, message); |
1 | public class MyActivity extends ActionBarActivity { |
我们在Activity通信中或者日常的Log中经常会用到本类的类名来唯一标示一些信息,如上面的代码。
4. 启动DisplayMessageActivity
1 | startActivity(intent); |
完整代码如下1
2
3
4
5
6
7public void sendMessage(View view) {
Intent intent = new Intent(this, DisplayMessageActivity.class);
EditText editText = (EditText) findViewById(R.id.edit_message);
String message = editText.getText().toString();
intent.putExtra(EXTRA_MESSAGE, message);
startActivity(intent);
}
处理收到的Message
打开DisplayMessageActivity.java,在OnCreate方法内添加如下代码
1 | // Get the message from the intent |
- 通过getIntent得到传入的Intent,通过个Message的
key找到相关信息 - 通过代码形式创建一个TextView(纯显示类文字控件),设置字体大小40px,文字内容为传入的message
- 设置这个Activity的contentView为刚刚创建的TextView
需要注意的是
这里我们用代码形式生成控件,只是展示另外一种创建控件的方法,但是这样增加了布局与Java代码的耦合,不利于今后的迭代,所以还是推荐在XML中创建控件,并通过ID来操作控件
运行App,并输入些内容,点击send按钮,观察效果。